Step1
In order to run Microsoft Windows and Windows applications on your Mac computer, you will have to install a virtual desktop manager, otherwise known as a virtual machine. There are several options for installing virtual desktop managers, including Microsoft's Virtual PC for Mac, Vmware Fusion & and Parallels Desktop for Mac.
Step2
All virtual desktop managers will allow you to either install a fresh Windows installation directly into the virtual machine, or transfer an existing windows computer system to the virtual machine through a network connection. These options are available during and after the installation of the virtual machine desktop manager.
Step3
Windows running on Mac Windows running on Mac After the virtual machine is installed on your Mac computer, and you have either installed or transferred your Windows operating system and applications, you will be able use your Mac computer with both Mac applications and Windows applications. When in virtual desktop mode, the system will look exactly like your Windows computer. You can browse the web, install applications, and run any application you would normally run on a windows system.
Monday, March 30, 2009
Friday, March 27, 2009
ipod Touch Friday: Remote Tap
RemoteTap 3 is a new kind of Mac remote desktop management
software for the iPhone and iPod Touch. It introduces several
first and only features for any VNC-like application
Get It Now
software for the iPhone and iPod Touch. It introduces several
first and only features for any VNC-like application
Get It Now
Wednesday, March 25, 2009
Mandriva 2009 Linux
The beta release of Mandriva Linux 2009 is now available. This beta version provides some updates on major desktop components of the distribution, including KDE 4.2.0, GNOME 2.25.90, Xfce 4.6 RC1, X.org server 1.5, OpenOffice.Org 3.0.1, qt 4.5.0 (RC1)
Get It Now
Get It Now
Monday, March 23, 2009
Wii: Madden 09

Celebrating 20 Years of Innovation, Madden NFL 09 delivers its most complete football package ever, combining a more authentic gameplay simulation experience and deeper game modes for the hard core fans with EA Sports Family Play, featuring an easy-to-use control system that help rookies master the game.
Check It Out
Friday, March 20, 2009
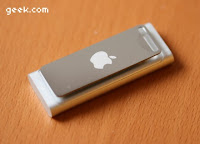
Apple iPod shuffle (Third-Generation)

Apple’s smallest, lightest iPod yet, and first iPod shuffle with remote control functionality. The iPod shuffle will leave you completely speechless – it’s half the size of its predecessor making it the smallest music player ever and offers more storage than before. Plus, it talks. With VoiceOver technology, this shuffle can tell you the title and artist of the song you’re listening to, announce the name of your playlists, and alert you when the battery is low.
Pre Order Now
Wednesday, March 18, 2009
iTunes brings Autofill to iPod
The iPod shuffle has always had less storage capacity than iPod models, so in order to keep the device full of music without requiring too much user input, Apple added the rather nifty Autofill feature to iTunes.
Autofill, the feature selects songs from playlists or your Library according to various preferences, and then switches out some or all of your music for fresh tunes.
Berka reports. The Autofill feature has only been available for the iPod shuffle, but the new iTunes 8.1 release allows Autofill to be used with any iPod or iPhone.
Monday, March 16, 2009
Choosing a Hard Drive for Backup
Step1
Choose a size.
Step2
Decide between mechanical and a solid state disk.
Step3
Decide on an internal or external hard drive.
.
Step4
Consider what speed you want.
Step5
Choose your style.
Choose a size.
Step2
Decide between mechanical and a solid state disk.
Step3
Decide on an internal or external hard drive.
.
Step4
Consider what speed you want.
Step5
Choose your style.
Friday, March 13, 2009
Wednesday, March 11, 2009
10 Reasons Why Your Windows Computer Runs Slow
1 - Virus, Trojans, and Other Malware
2 - Spyware and Adware.
3 - Fragmented hard drive
4 - Not Enough RAM
5 - Startup Programs & Background Applications
6 - Windows Registry Problems
7 - Windows Updates not current
8 - Full Hard Drive
9 - Graphics Hardware Underpowered
10 - Anti-Virus Software Too Restrictive
These are the top 10 reasons your Windows XP or Windows Vista computer may run slow
Monday, March 9, 2009
Friday, March 6, 2009
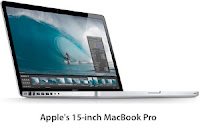
New Apple 17" Macbook Pro

Releases 14 Mar/09. High-end graphics, sleek design, incredible battery life – this is the new 17" MacBook Pro. Its precision aluminium casing is built for ultra-portability, while the high-resolution widescreen and advanced NVIDIA graphics deliver jaw-dropping images. And with the ability to keep working for up to 8 hours on a single charge, MacBook Pro now comes standard with a 2.66GHz processor, up from the 2.53GHz
Pre Order Now
Wednesday, March 4, 2009
FireWire 400 Reaches end of the line
With the exception of the white MacBook, it’s FireWire 800 or no FireWire from here on out
In the long term, any FireWire devices purchase in the future include FireWire 800 support, the days of FireWire 400 have now passed.
If I want to continue using these devices with a new Mac, I’ll have to add something like Sonnet’s FireWire 400-to-800 Adapter , least in the short term.
In the long term, any FireWire devices purchase in the future include FireWire 800 support, the days of FireWire 400 have now passed.
If I want to continue using these devices with a new Mac, I’ll have to add something like Sonnet’s FireWire 400-to-800 Adapter , least in the short term.
Monday, March 2, 2009
Set up a Wired Network on a Mac
1 Start by running all of your data cabling from each computer, printer, and other devices that have LAN capabilities.
Step2
Select an appropriate place for your network switch or hub. This can be near to where the broadband or DSL cable enters your home.
Step3
Install your cable router. Plug the router in and turn it on.
Step4
Connect a CAT5 cable from the cable router to your network switch and plug it in. Turn it on. Connect all the CAT5 cables from the computers, printers, and other devices into the network switch.
Step5
It's now time to set all your devices to "talk" on the network. Open system preferences and select "network." In the drop-down menu select your location or select "edit locations" if you want to set up a new location.
Step6
In the left panel of the network preferences window, select an ethernet option. It should have a green dot next to it and say connected. If there is no option available, or it does not say show that you are connected, you will need to check your cabling, etc. to troubleshoot why your computer is not showing a connection.
Step7
Once you select the ethernet connection that you'll be using, you should see a message that says something like, "Ethernet is currently active and has the IP address of 192.168.1.100 (you won't see those exact numbers).
Step8
Look for the configure drop down box and select the option that says DHCP. Enter your IP address. Subnet mask and Router IP should fill in automatically. You may need to restart your computer at this time in order to get the router switch to recognize your computer.
Step9
Last, open network preferences and select, "sharing." Give your computer a unique name and select the check boxes of the items you wish to share with other computers on your LAN. You can even allow other users to control your DVD optical drive,
Subscribe to:
Comments (Atom)


