iPod Touch 2nd Generation
1.) Extract redsn0w lite and XPwn to your Desktop.
2.) Save (or move) the 2.2.1 IPSW into the XPwn folder.
3.) In the rslite101 folder, there should be a FirmwareBundles folder; copy the iPod2,1_2.2.1_5H11.bundle into your XPwn\FirmwareBundles\ folder.
4.) Open up a Command Prompt (type cmd in the Search bar if on Vista).
5.) Type the following:
If you’re running XP, your location will be a bit different (should be C:\Documents and Settings\yourusername\Desktop\).
Also, if you’re running XP (with PowerToys), Vista, or 7, you can easily navigate to folders in a Command Prompt without using cd.
Simply hold shift, then right click on a folder (here, for example, you’d shift and right click on XPwn-0.5.7-win32), then select Open Command Window here.
This can be done with any other part of this tutorial that involves cd. Thanks, MatthewH12!
6.) Wait for XPwn to finish, it should only take a few minutes.
7.) Extract all files in the iRecovery RAR to your Desktop and open the iRecovery folder, there should be an installer for libusb located here.
If you haven’t already installed libusb, please do so now.
If you’re running Vista or 7, please right click the .exe and select Properties, then click the Compatibility tab, then select Windows XP (Service Pack 2) from the drop-down menu.
After install, a restart may be required.
8.) Open another Command Prompt (or use the one you used before, if it is still up) and type the following:
Again, your location will be different if you’re on XP, see above.
9.) Extract your 2.1.1 iBSS and 2.2.1 iBSS and iBoot.
To do so, right click your 2.1.1 IPSW and select Open with > WinRAR archiver.
Navigate to the Firmware\dfu directory, then drag iBSS.n72ap.RELEASE.dfu into your iRecovery_SVN folder.
Rename it iBSS211.dfu.
Now, open up your custom 2.2.1 IPSW using WinRAR.
First, navigate to the Firmware\dfu folder and drag iBSS.n72ap.RELEASE.dfu into your iRecovery_SVN folder.
Rename is iBSS221.dfu.
Now, navigate to the Firmware\all_flash\all_flash.n72ap.production folder.
Extract iBoot.n72ap.RELEASE.img3 to your iRecovery_SVN folder.
Rename it iBoot221.img3.
10.) Put your iPod into DFU mode (this is out of the scope of this tutorial, sorry).
Bring up your Command Prompt again and execute the following:
Code:
Your iPod’s screen should turn white.
If it doesn’t, unplug your iPod and wait 10 seconds, then plug it back in.
11.) In the same Command Prompt, enter the following:
Code:
Just to clarify, you will hit enter after each of these commands.
12.) Restore to your custom firmware using iTunes (hold shift and hit Restore, then select iPod2,1_2.2.1_5H11_Custom_Restore.ipsw).
It may hang on “Preparing..” for a long time; just wait it out, it’ll move on eventually.
13.) After your restore is complete, put you iPod into DFU mode, you’ll have to apply the patch again to boot.
You will also have to do these same things each time you boot from now on:
Code:
Unplug your iPod, wait 10 seconds, then plug it back in.
Your screen should be white now.
Run the following after:
Code:
Wait for your iPod to reconnect (it should disappear in iTunes, then reappear in a couple seconds).
Run the following:
Code:
14.) Your iPod should now be booting; enjoy you tethered jailbreak.
Also, don’t forget that if you want to reboot your iPod, each time you’ll have to repeat step 13, and step 13 only.
Edit: Please do not PM me right now, I can’t help you.
It’s my birthday today, so people are at my house for my party (that I didn’t even want).
Also, I don’t have a 2G and cannot really troubleshoot that well.
Please ask in the thread or search.
Sorry.
Also, if you think you’ve bricked your device, you haven’t.
Keep trying to enter either restore or DFU mode, there’s always a way to save your device, just don’t panic.
Do at own risk!!!!
Friday, February 27, 2009
Wednesday, February 25, 2009
Monday, February 23, 2009
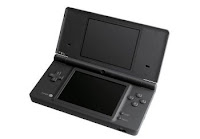
Nintendo DSi Rocks

The Nintendo DSi is on the horizon, but the millions and millions of original DS and DS Lite owners may be asking themselves whether picking up a new version of their favorite portable is necessary.
1. Music
2. Photos
3. Downloads
4. Design
5. Storage
Friday, February 20, 2009
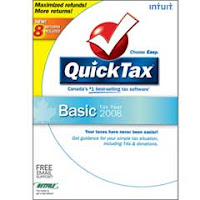
Software: QuickTax Basic

QuickTax now includes 8 returns! More powerful
tools help you find all your personal & self-employment deductions and get the refund you deserve.
Get it now
Wednesday, February 18, 2009
Monday, February 16, 2009
Protect your wireless internet
1 When your wireless router isn't in use,
it is a good idea to simply turn it off.
2 Connect to the router interface (usually by opening the IP of the router) Enter your name and password, then change them. Most wireless routers get hacked because most people forget to change the default password.
3 Disable the services that you don't need. These can leave gaps.
Enable a firewall, and if your wireless network has it, a logging feature. Monitor both of these.
And finally if possible use authentication.
Friday, February 13, 2009
ipod Touch Friday: SlotZ Racer 1.1
SlotZ Racer lets players race against the computer or friends; a unique control system allows up to 4 people to race on a single iPhone.
Get it now
Get it now
Wednesday, February 11, 2009
Windows Wednesday
Windows XP Service Pack 3
Windows XP Service Pack 3 (SP3) is now available for download and install via Windows Update and the Microsoft Download Center. Windows XP SP3 includes all previously released updates for the operating system, in addition to a small number of new updates.
Get it now
Windows XP Service Pack 3 (SP3) is now available for download and install via Windows Update and the Microsoft Download Center. Windows XP SP3 includes all previously released updates for the operating system, in addition to a small number of new updates.
Get it now
Monday, February 9, 2009
DVD + vs DVD - The Differnce?
DVD-R:
Benefits: Better DVD playback compatiblity within home DVD players.
Drawbacks: Older technology and less money behind the format means that they come out with faster media and burner technology slower. You will frequently see DVD burners that will support (for instance) 16X DVD+R and only 8X DVD-R.
DVD+R:
Benefits: Faster speeds, more inovations like Double Layer discs (8.5 GB)
Drawbacks: Will not play is some home DVD players. If you know your home DVD player will play DVD+Rs then there is no reason to not use them.
Friday, February 6, 2009
iPhoto ’09

Faces feature in iPhoto ’09.
When you first click on the Faces item in the iPhoto sidebar, iPhoto automatically analyzes all your photos.
Once you’re up and running, Faces will automatically scan any new photos you import and if it recognizes the faces, will automatically tag them properly.
After iPhoto finishes its facial analysis, you have to tell the application who is who. Select a photo and then click on the Name button at the bottom of the window. In the background iPhoto will immediately try to find other photos containing the same person, and an entry for that person will appear in the Faces view.
So Cool
Check it out
Wednesday, February 4, 2009
Securing PDFs
In Mac OS X Leopard, you can create a PDF in most applications simply by selecting Print from the File menu, clicking the PDF button, and choosing Save as PDF from the drop-down menu. But did you know that you can also password protect the PDFs you create, making them more secure in the process
Monday, February 2, 2009
How to Install OS X Leopard

Step 1
Verify that your computer can handle being upgraded to Leopard. Your computer will need to have a processor with an 867 MHz processor, 512 MB of memory, a DVD or CD-ROM drive and 9 GB of available disk space.
Step2
Disconnect any iPods, scanners or other external devices before attempting to install Leopard.
Step3
Insert the Mac OS X Leopard installation DVD into your DVD or CD-ROM drive. Double-click the installation icon that pops up on your desktop. If you prefer, you can insert the DVD and restart your computer. Be sure to select the installation DVD on startup.
Step4
Follow the installer's instructions once the window opens. The installer will upgrade your Mac to Leopard by default,
Step 5
Decide how you want to install Leopard.
Step6
Install Leopard by following the on-screen instructions.
Step7
Restart your computer. Start plugging in your external devices one by one, allowing your computer to recognize them. Test them to make sure they work. If they don't, visit the manufacturer's website in case there are any firmware updates you need to install so your hardware works with Leopard.
Subscribe to:
Comments (Atom)


